Chapter 4
Your receiver
The pilotADSB receiver picks up ADS-B signals from aircraft (and Remote ID from drones, if it has the module) and sends them to the app. This chapter covers connecting to it, reading its status, changing its settings, and keeping its software up to date.
4.1Connect to your receiver
Needs a receiver
- Power on the receiver and wait about a minute for it to start.
- In Select Data Source, tap Establish ADS-B Connection.
- The app looks for receivers nearby and asks How do you want to connect? Pick a method; Bluetooth, WiFi, or both explains the choices.
- After a few seconds the ADS-B: line in the status bar shows your receiver, and traffic starts appearing.
4.2Bluetooth, WiFi, or both
Needs a receiver
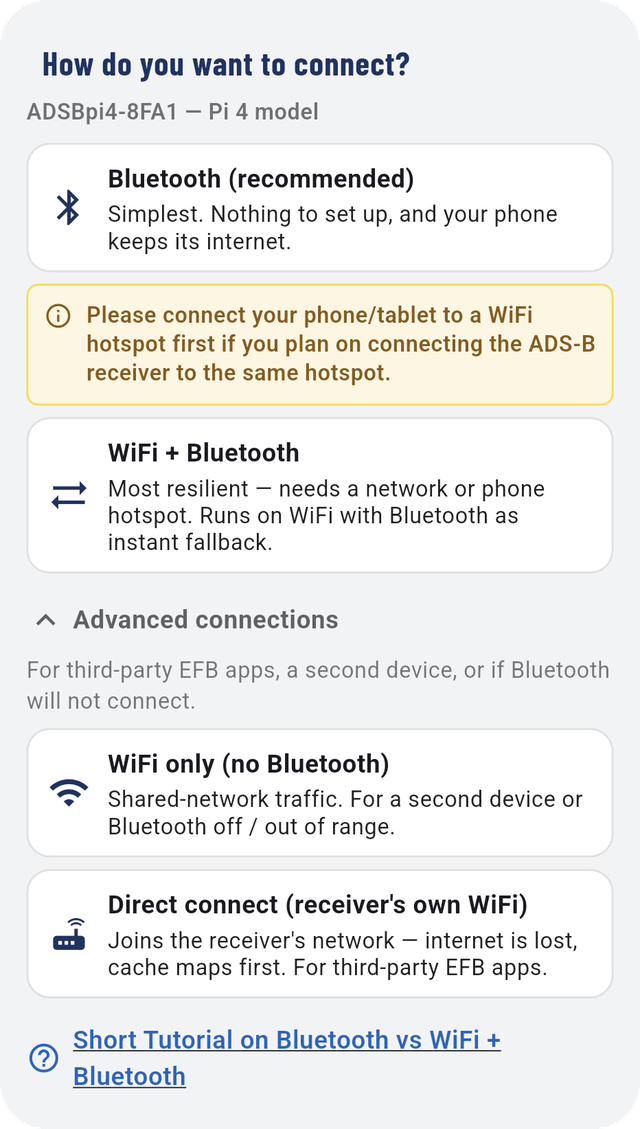
How do you want to connect? offers these:
| Method | When to use it |
|---|---|
| Bluetooth (recommended) | Simplest. Nothing to set up, and your phone keeps its own internet for maps and weather. |
| WiFi + Bluetooth | The sturdiest link. The receiver joins a WiFi network (a router or your phone's hotspot) and Bluetooth stands by as an instant backup. |
| WiFi only (no Bluetooth) | Under Advanced connections. For third-party EFB apps, a second device, or when Bluetooth won't connect. |
| Direct connect (receiver's own WiFi) | Under Advanced connections. Your phone joins the receiver's own network. You lose internet, so cache your maps first (Maps with no signal). |
Note
If you plan to put the receiver on your phone's hotspot, turn the hotspot on before choosing WiFi + Bluetooth.
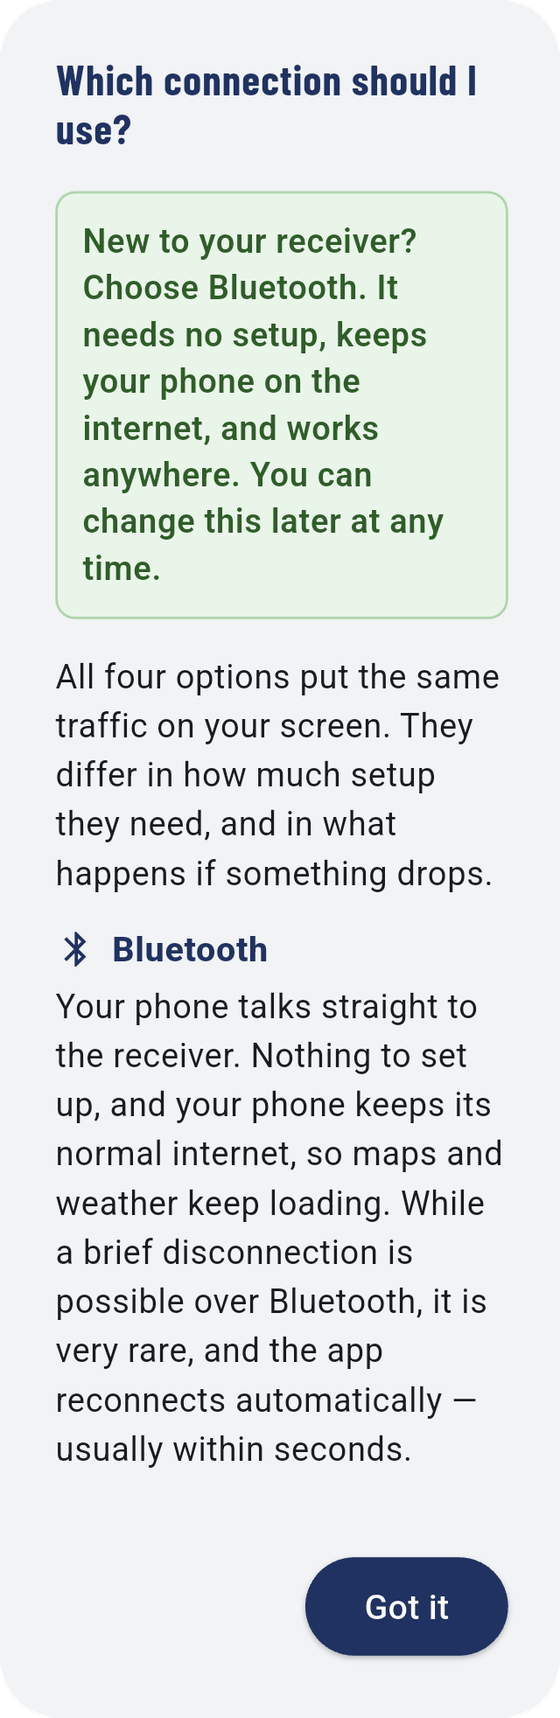
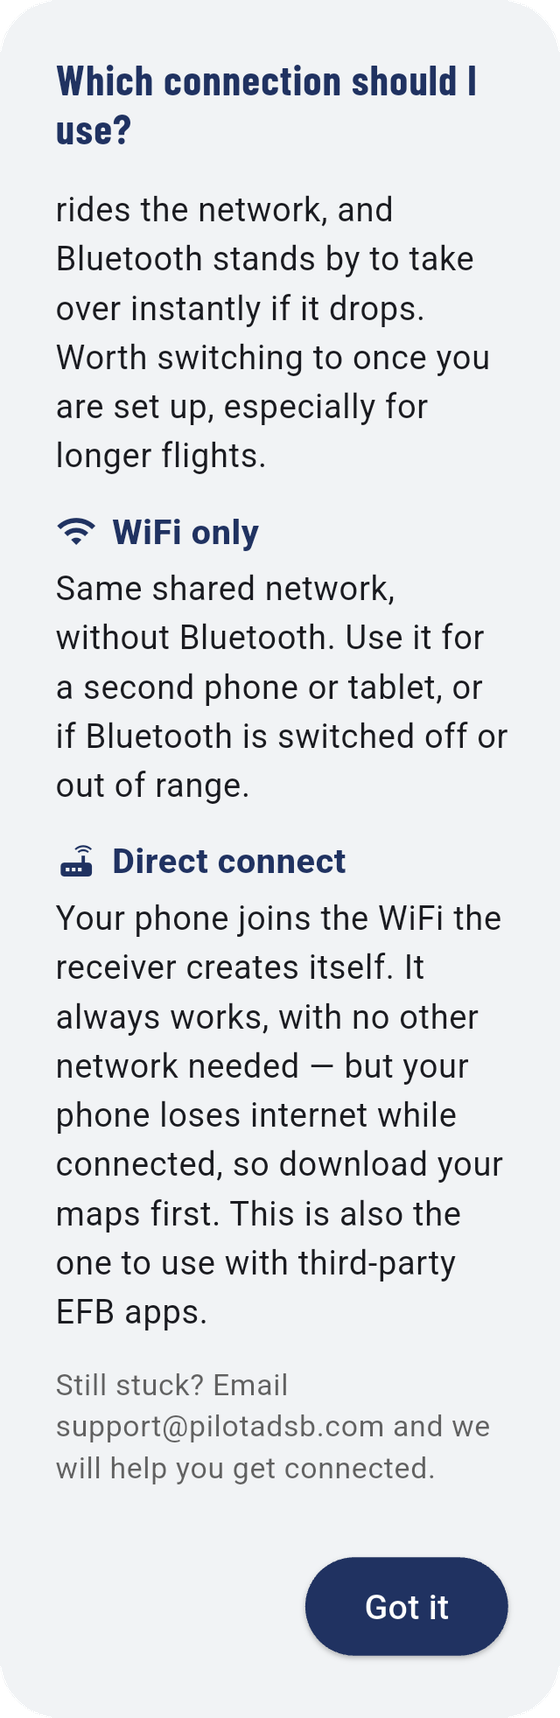
Short Tutorial on Bluetooth vs WiFi + Bluetooth, at the bottom, opens a plain explanation of the difference.
4.3Put the receiver on a WiFi network
Needs a receiver
Which WiFi should the receiver use? lists the networks nearby.
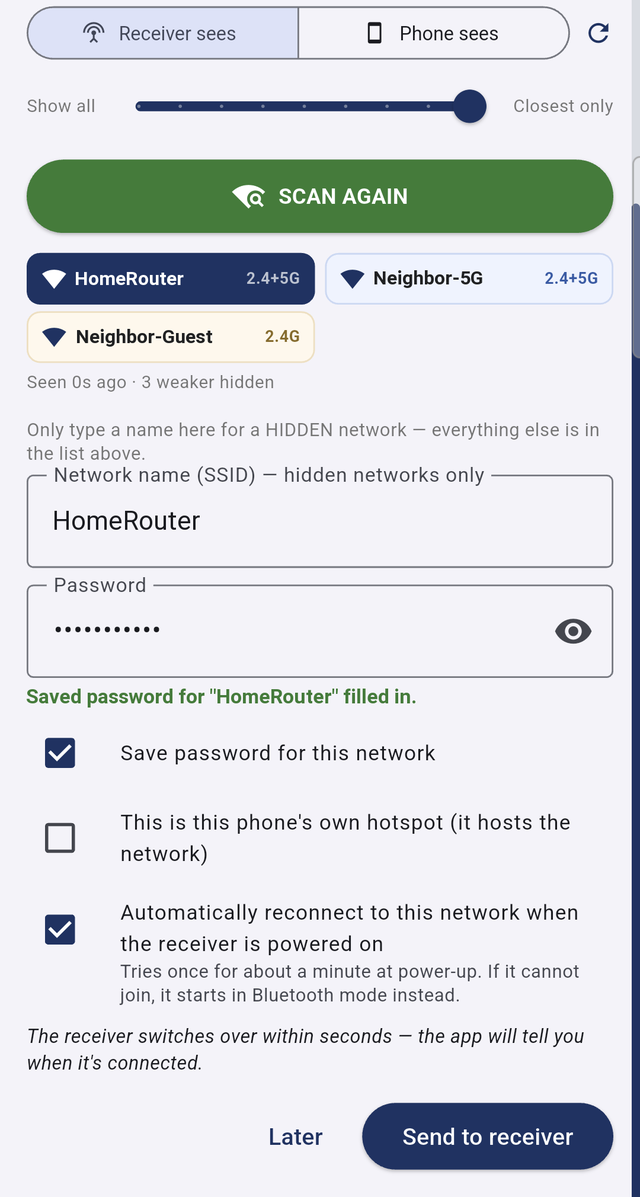
- Choose whose list to show: Receiver sees (networks the receiver can hear) or Phone sees. Show all and Closest only narrow it down. Tap SCAN AGAIN to refresh.
- Tap your network. A network you've used before fills in its saved password.
- Type the Password if it isn't filled in. An open network with no security needs no password; the app says so.
- Set the options: - Save password for this network: remember it for next time. - This is this phone's own hotspot (it hosts the network): tick this when the network is your phone's hotspot. - Automatically reconnect to this network when the receiver is powered on: the receiver tries this network for about a minute at power-up, then falls back to Bluetooth if it can't join.
- Tap Send to receiver.
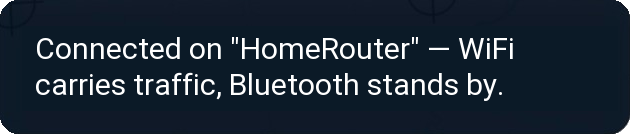
The receiver switches over within seconds, and the app confirms it:
Note
A WiFi router works best. A phone's hotspot works too.
Only type in Network name (SSID) for a hidden network that doesn't broadcast its name. Everything else is in the list.
4.4The receiver window
Needs a receiver
With the receiver connected by Bluetooth, Receiver opens Bluetooth Connected. It's the control center for the receiver, and also holds a few app settings. From top to bottom:
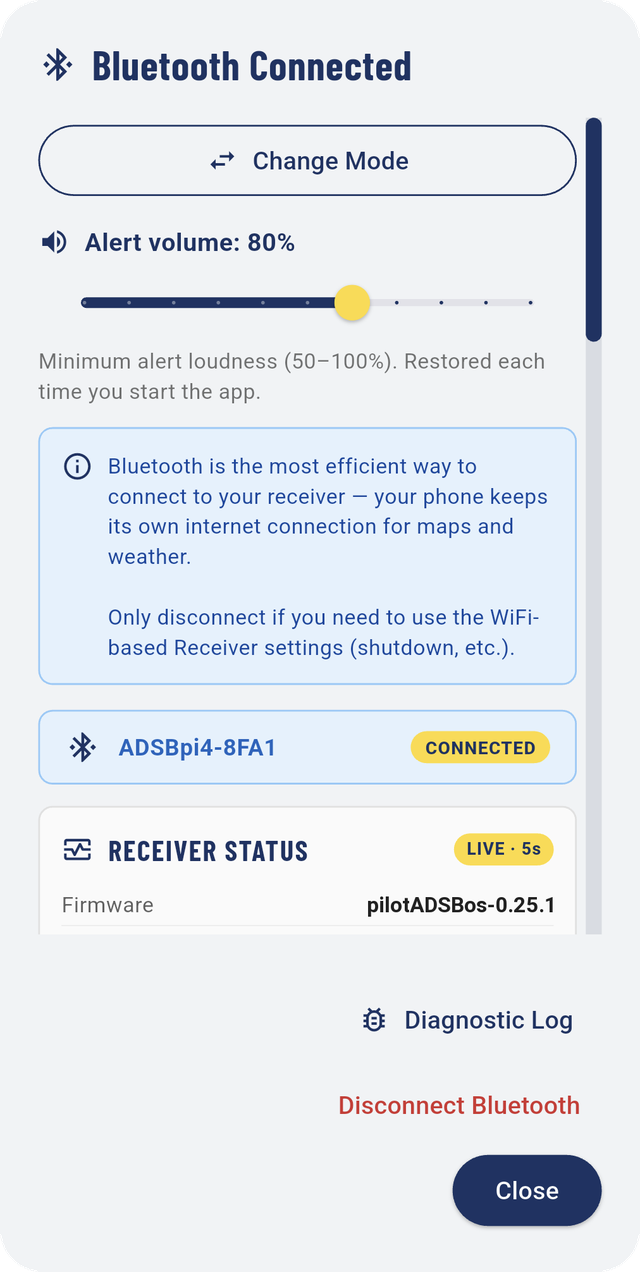
- Change Mode: back to Select Data Source.
- Alert volume: the minimum loudness of spoken alerts, 50–100%. The app restores it every time it starts, so a phone left on low volume still speaks up. See Alert volume.
- The name of your receiver, marked CONNECTED.
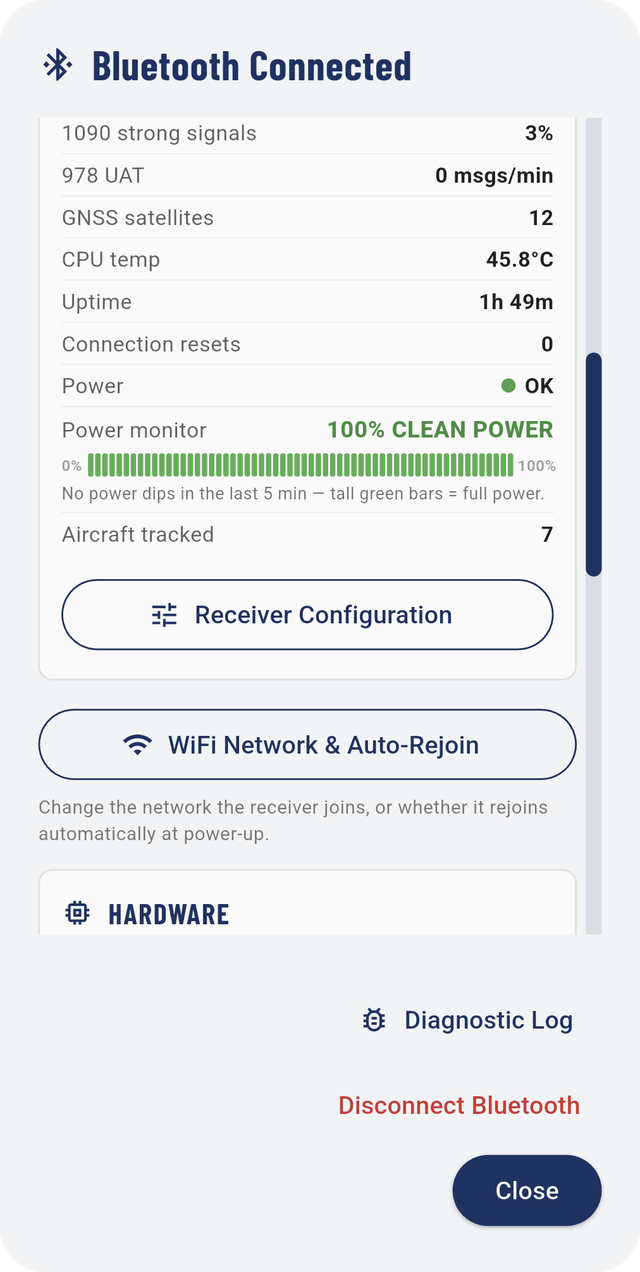
- RECEIVER STATUS: live health readings, updated every five seconds (Receiver status).
- Receiver Configuration: the receiver's own settings (Receiver configuration).
- WiFi Network & Auto-Rejoin: which network the receiver joins (Put the receiver on a WiFi network).
- HARDWARE: what's inside the receiver and how it's connected (Receiver hardware).
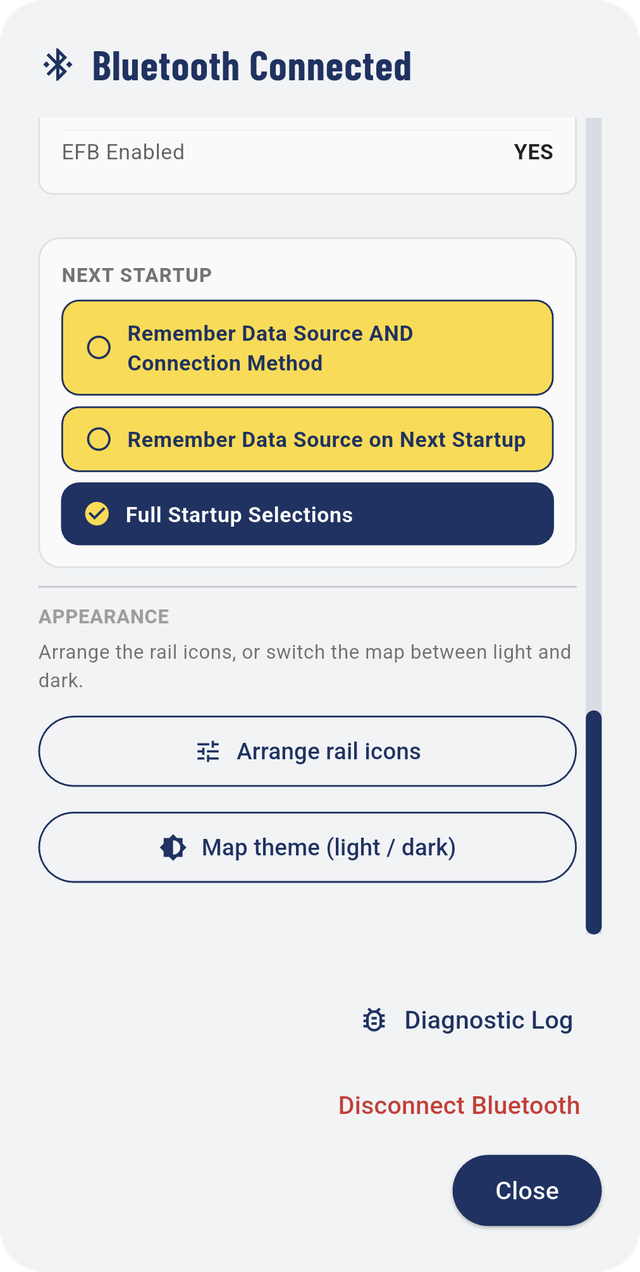
- NEXT STARTUP: what happens when the app opens (Skip this screen next time).
- APPEARANCE: Arrange rail icons (Arrange the rail buttons) and Map theme (light / dark) (Light or dark map).
At the bottom: Diagnostic Log (Diagnostic log), Disconnect Bluetooth, and Close.
4.5Receiver status
Needs a receiver
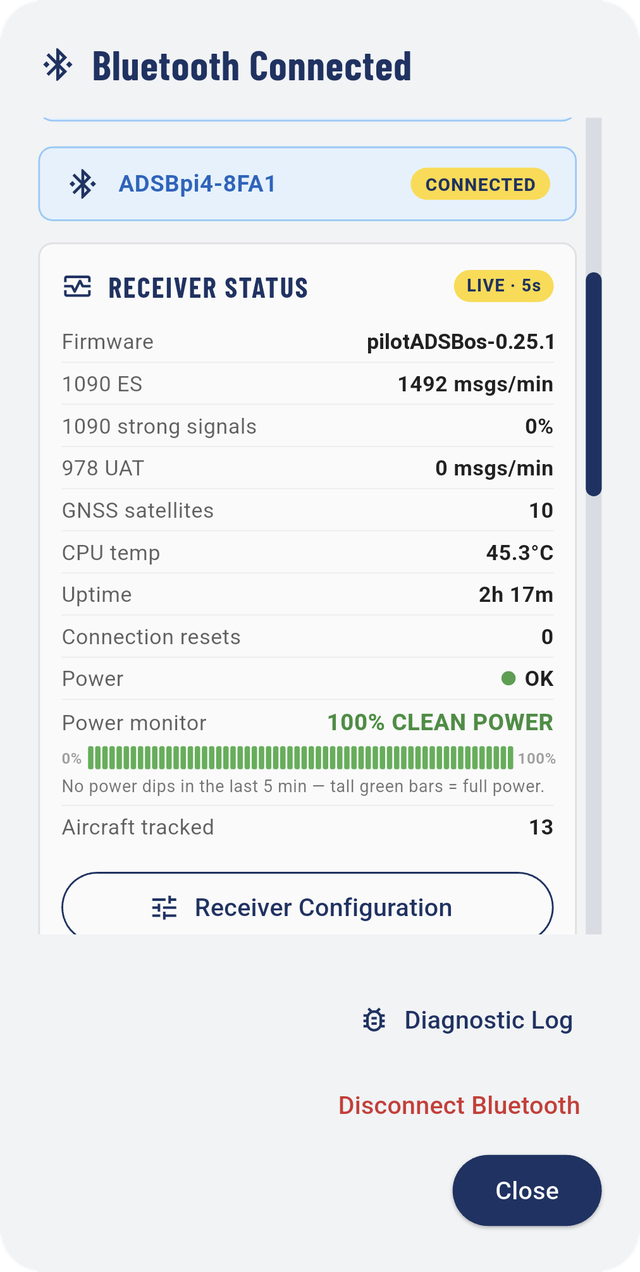
| Reading | What it means |
|---|---|
| Firmware | The receiver's software version. When an update is available, a panel appears here (Update the receiver's software). |
| 1090 ES | Messages per minute from aircraft on 1090 MHz, the frequency most aircraft use. |
| 1090 strong signals | The share of messages that are very strong. A high number near an airport is normal; see SDR gain in Receiver configuration. |
| 978 UAT | Messages per minute on 978 MHz, used by some light aircraft in the US below 18,000 ft. |
| GNSS satellites | Satellites the receiver's own GPS is using. |
| CPU temp | The receiver's processor temperature. |
| Uptime | How long since the receiver started. |
| Connection resets | How often the link to the phone dropped and recovered. |
| Power and Power monitor | Whether the power supply is steady. 100% CLEAN POWER with tall green bars is what you want; dips mean the receiver may be missing aircraft. |
| Aircraft tracked | How many aircraft the receiver hears right now. |
4.6Receiver hardware
Needs a receiver
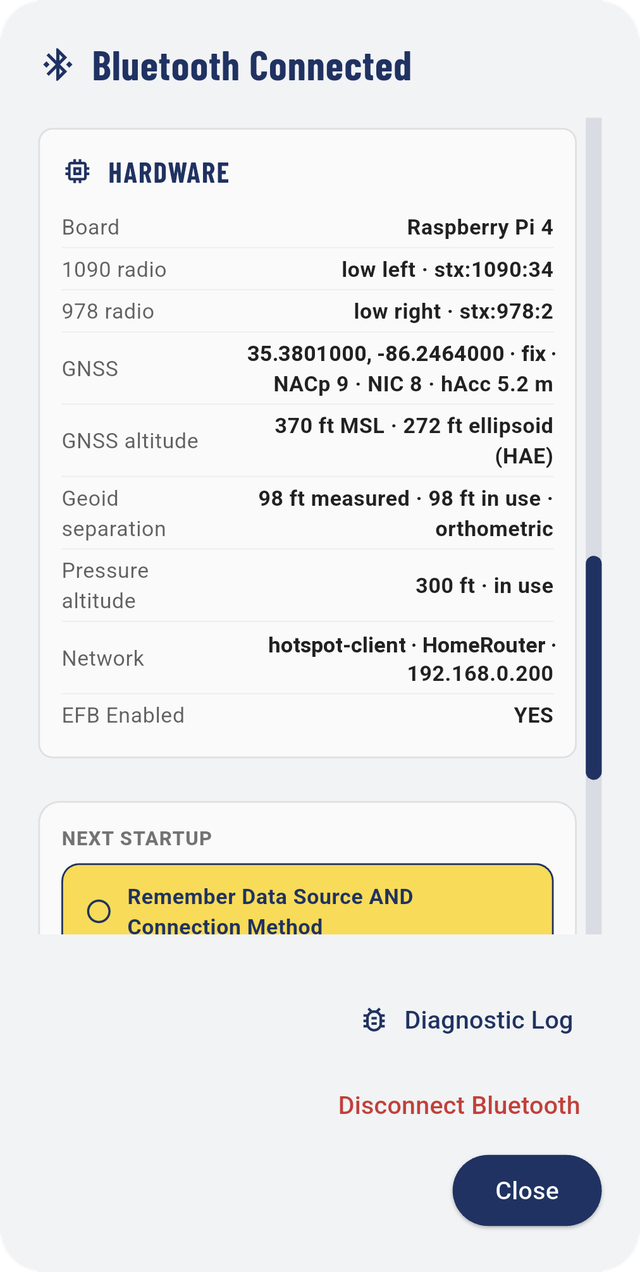
HARDWARE shows the receiver's board and radios, its GPS position and fix quality, altitude readings, how it's connected (for example hotspot-client plus the network name and address), and EFB Enabled, which tells you whether it also feeds electronic flight bag apps.
4.7Receiver configuration
Needs a receiver
These are settings stored on the receiver itself.
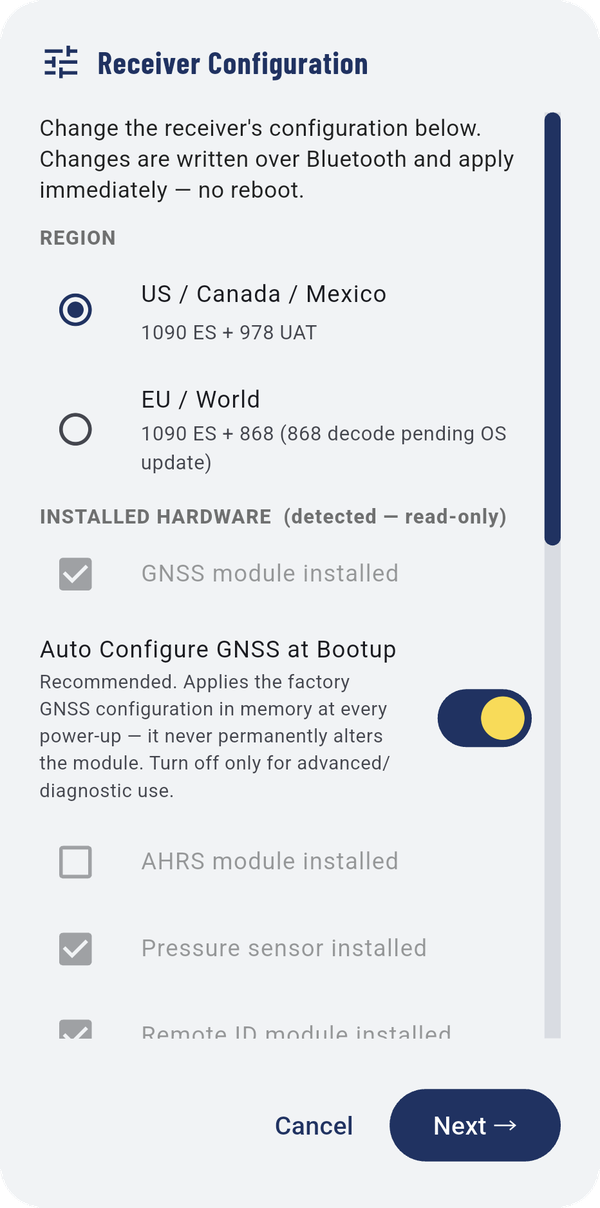
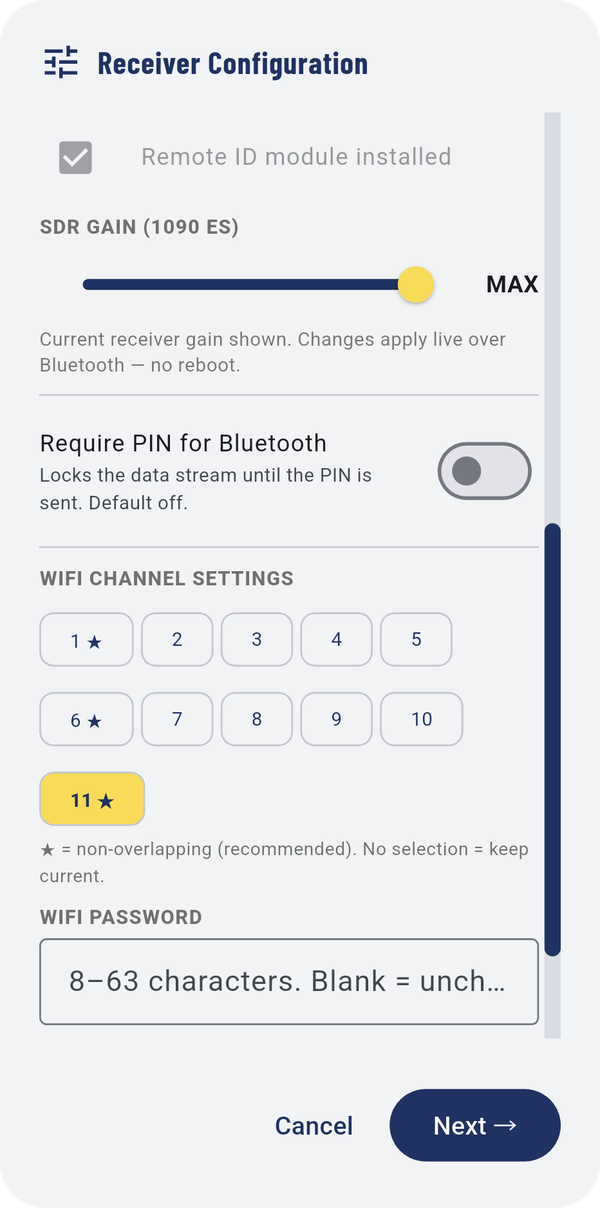
| Setting | What it does |
|---|---|
| REGION | US / Canada / Mexico (both 1090 ES and 978 UAT) or EU / World (1090 ES only). |
| INSTALLED HARDWARE | What the receiver found inside itself: GNSS, AHRS, pressure sensor, Remote ID module. You can't change these; they're detected. |
| Auto Configure GNSS at Bootup | Sets up the GPS each time the receiver starts. |
| SDR GAIN (1090 ES) | How sensitive the 1090 radio is. Lower it near a busy airport, where strong signals can swamp the receiver; raise it for the longest range in open country. |
| Require PIN for Bluetooth | Asks for a PIN before a phone can connect. Off by default. |
| WIFI CHANNEL SETTINGS | The channel for the receiver's own network. Channels 1, 6 and 11 are marked with a star because they don't overlap. |
| WIFI PASSWORD | The password for the receiver's own network, 8–63 characters. Leave it blank to keep the current one. |
| OWNSHIP ICAO ADDRESS | If the receiver is carried in an aircraft that has a transponder, enter that aircraft's code here so the app doesn't warn you about yourself. |
Receivers with an attitude sensor (AHRS) also show INTENDED USE OF ADSB: Stationary, Moving, or Flying.
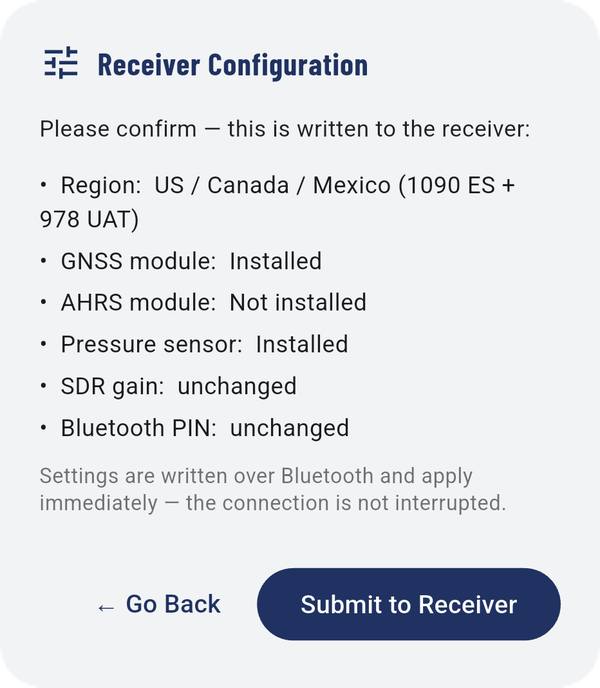
When you're done, tap Next →. The app shows exactly what it's about to write to the receiver. Tap Submit to Receiver to save it, or ← Go Back to change something.
4.8Update the receiver's software
Needs a receiverNeeds internet
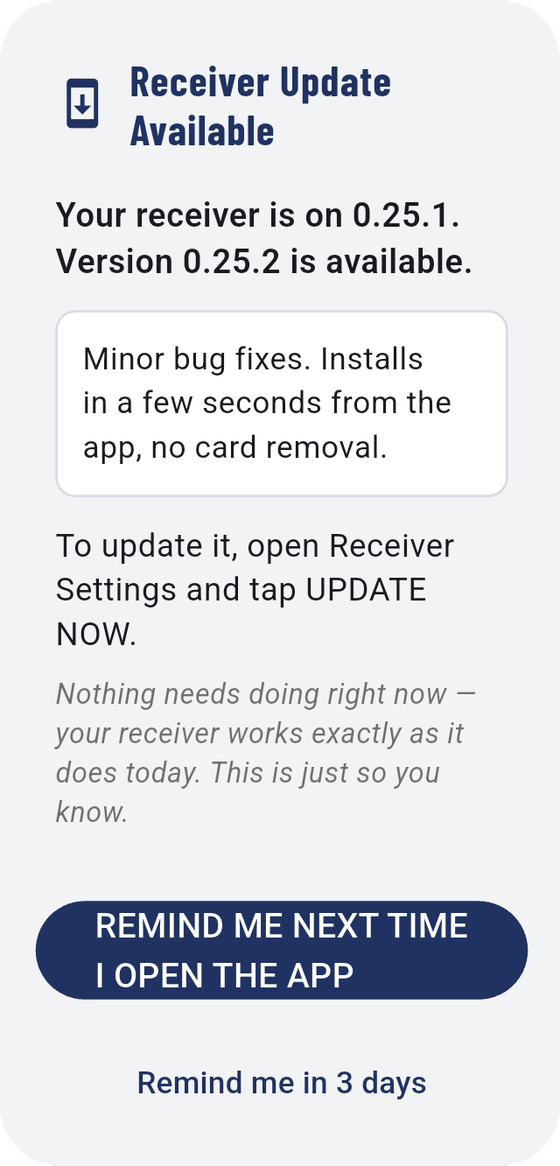
When a new version is out, the app tells you right after it connects to the receiver.
Before you update
Your phone downloads the update and then sends it to the receiver over WiFi. So:
- Your phone needs internet, over WiFi or mobile data.
- Your phone must reach the receiver over WiFi: WiFi + Bluetooth, WiFi only, or Direct connect. Bluetooth is too slow to carry the update. Over Bluetooth alone the panel says "You must be connected via WiFi in order to update the receiver firmware.", with a button to change the connection.
- Do it at your desk, not right before a flight. The receiver restarts at the end.
Caution
On Direct connect the receiver's own WiFi has no internet, so the phone downloads over mobile data. A tablet with no mobile data has no way to download the update there. Put the tablet and the receiver on a router or a hotspot that has internet instead.
Steps
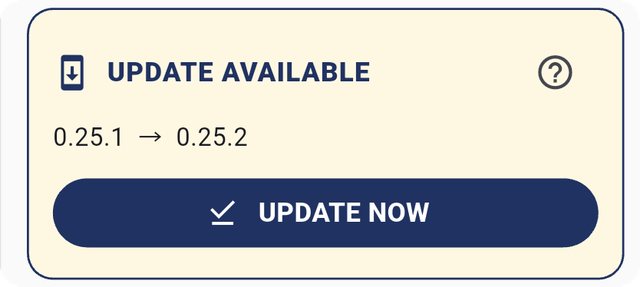
- Tap Receiver. Under RECEIVER STATUS you'll see
UPDATE AVAILABLE with your version and the new one. The ? shows
what's in the update.
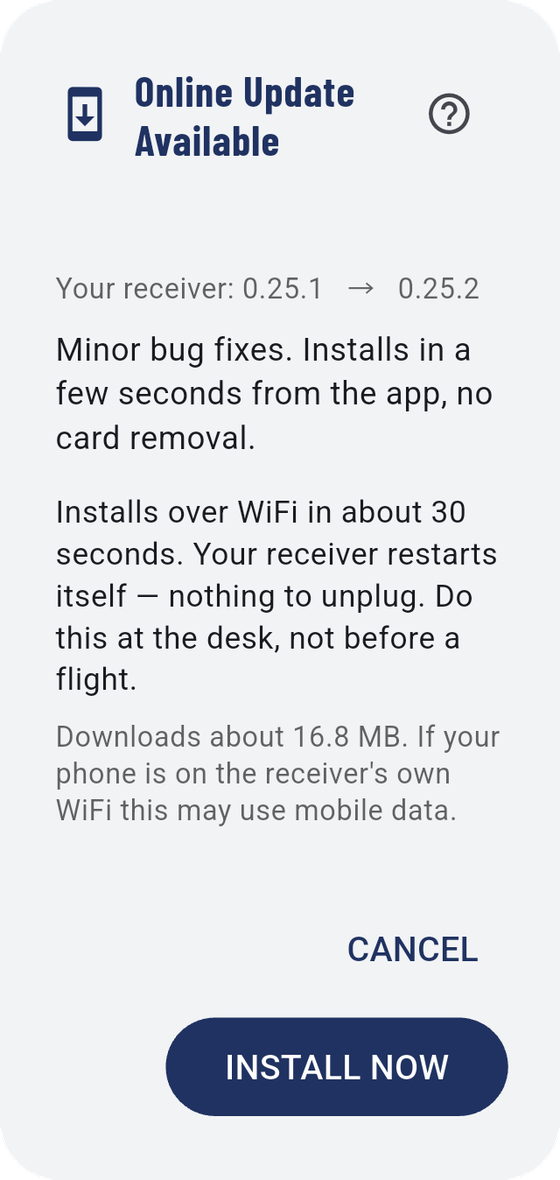
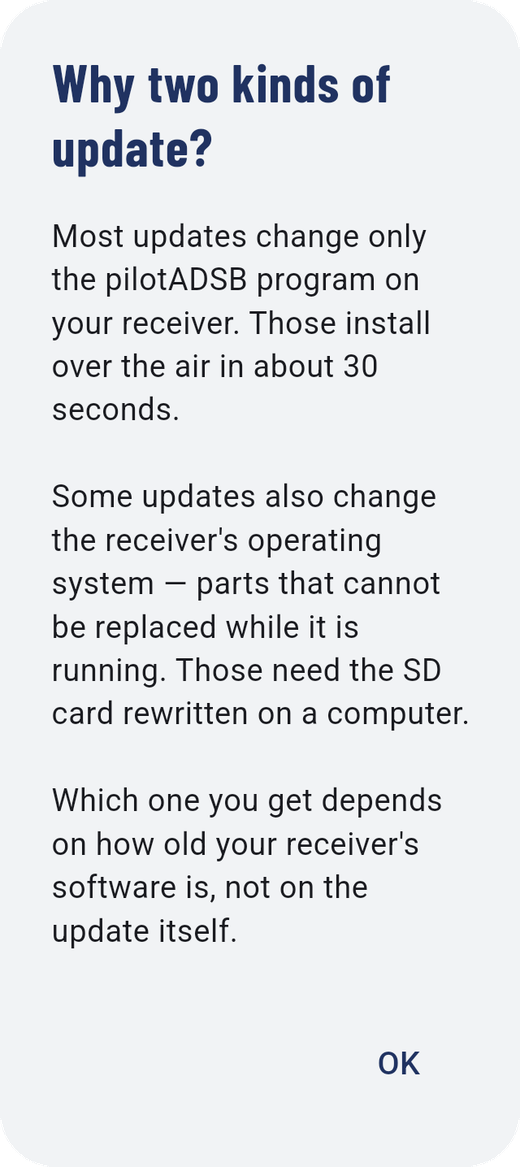
- Tap UPDATE NOW. Online Update Available explains what happens. Its ? explains Why two kinds of update?
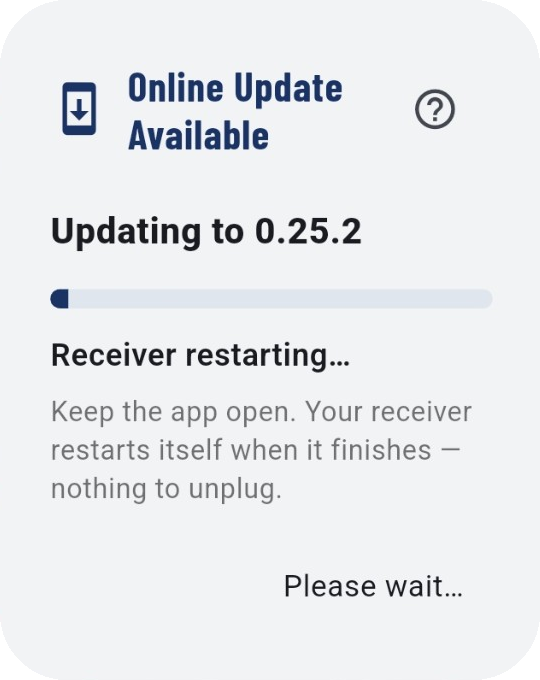
- Tap INSTALL NOW. The button reads STARTING…, then the window shows each stage: Checking the receiver…, then Receiver restarting…. Keep the app open.
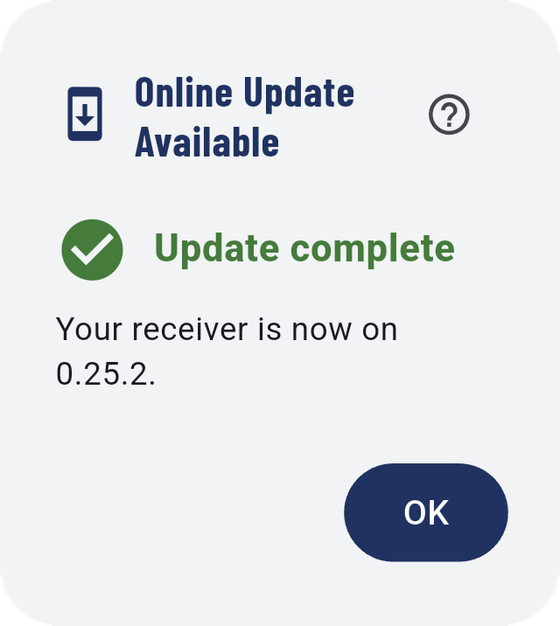
- When it's done: Update complete — Your receiver is now on the new version. Tap OK.
Most updates install in about 30 seconds, with nothing to unplug. A few change parts of the receiver's operating system that can't be replaced while it's running; those need the SD card rewritten on a computer.
4.9Diagnostic log
Needs a receiver
The log records every time the Bluetooth connection drops: how long it lasted, the last keepalive, the reconnect attempts, and whether it recovered quietly or fired the disconnect alarm. If you contact support about dropouts, send this log.
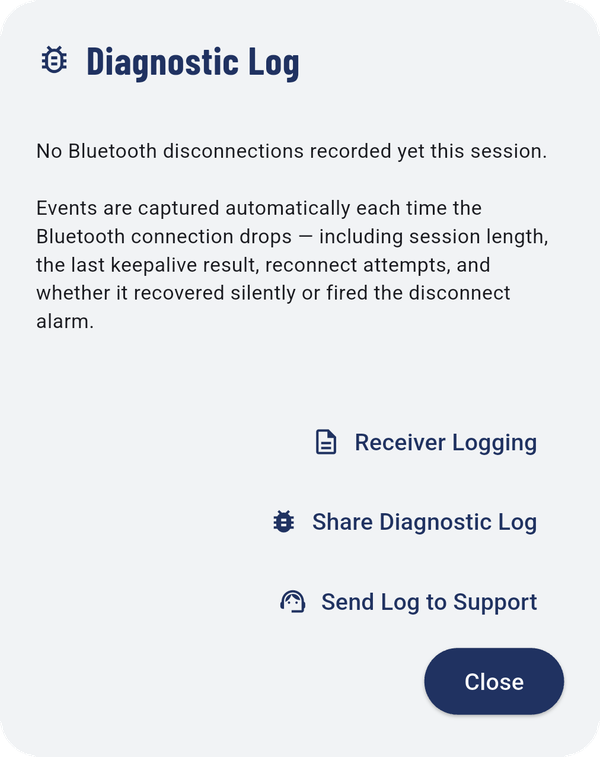
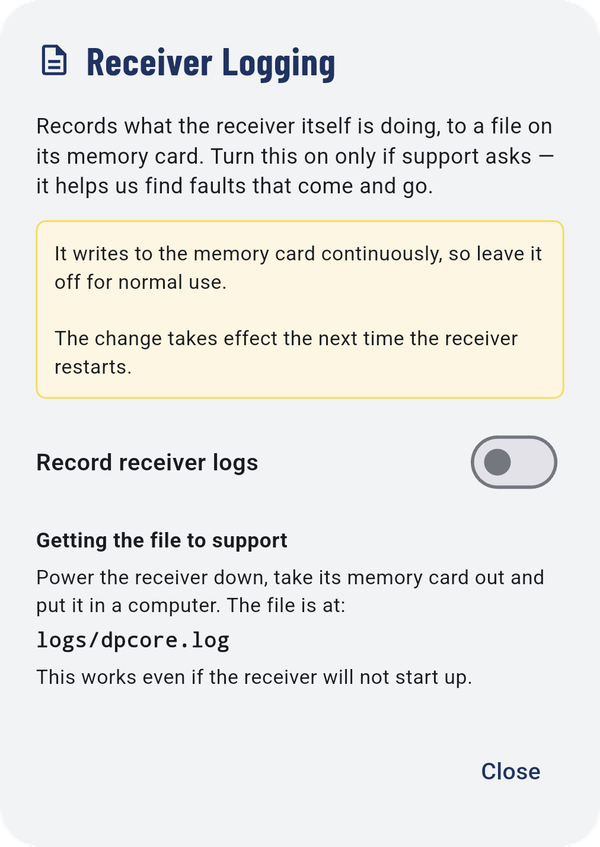
- Receiver Logging: turns on logging on the receiver itself (Receiver logging).
- Share Diagnostic Log: share it by email or a messaging app.
- Send Log to Support: sends it to support.
4.10Receiver logging
Needs a receiver
Record receiver logs makes the receiver write a log to its memory card continuously. The change takes effect the next time the receiver restarts. Leave it off unless support asks for it.
4.11When the connection drops
Needs a receiver
If traffic from the receiver stops, the app sounds an alarm and shows ADS-B Connection Lost. This is usually a brief Bluetooth hiccup and the app is already reconnecting.
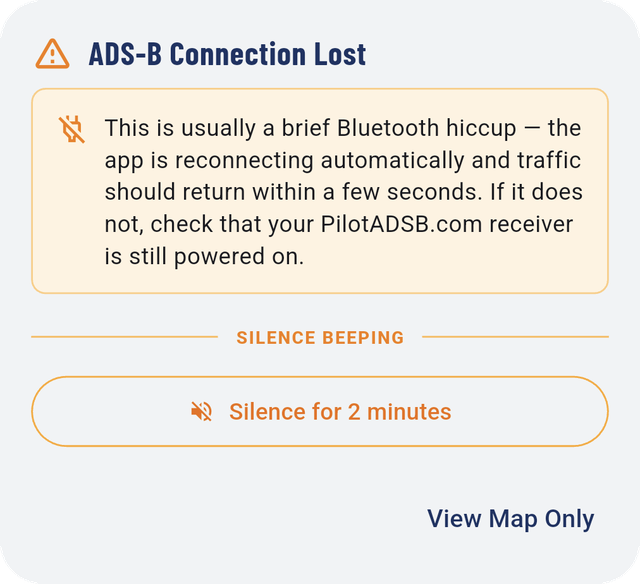
- Silence for 2 minutes stops the beeping while it reconnects.
- View Map Only switches to the map without traffic.
If it keeps happening, check the receiver's power (see Power monitor in Receiver status), move the phone closer, or use WiFi + Bluetooth.
4.12The receiver window without Bluetooth
When there's no Bluetooth connection, Receiver opens a window titled RECEIVER. Besides Change Mode, Subscribe and Alert volume, it has:
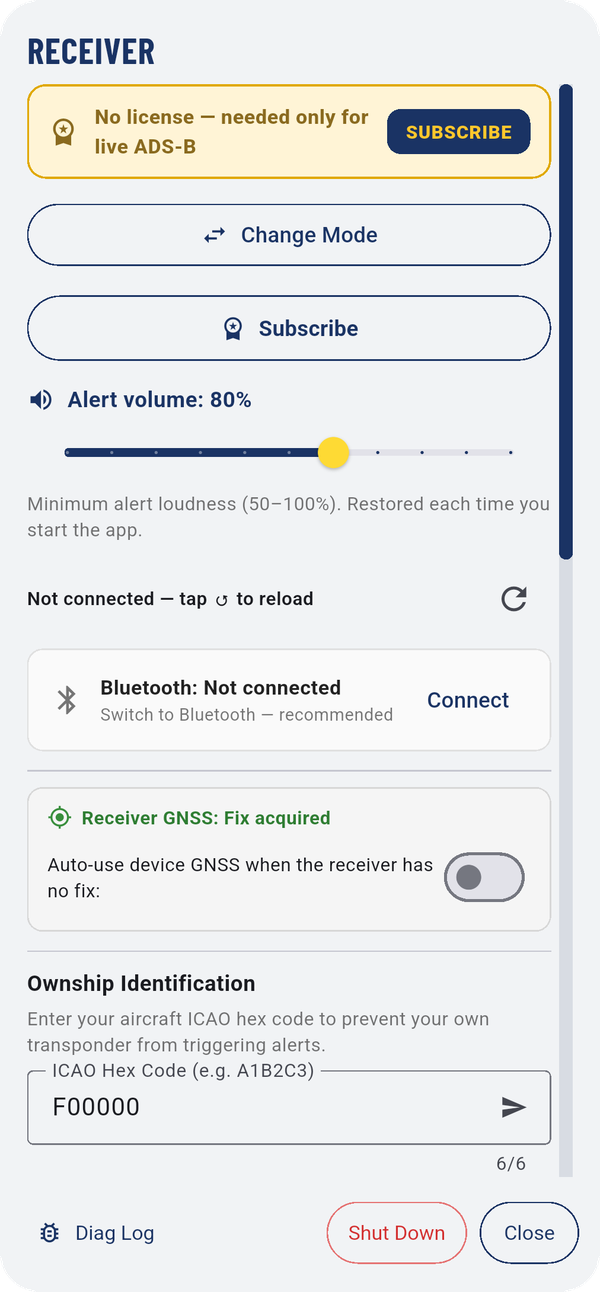
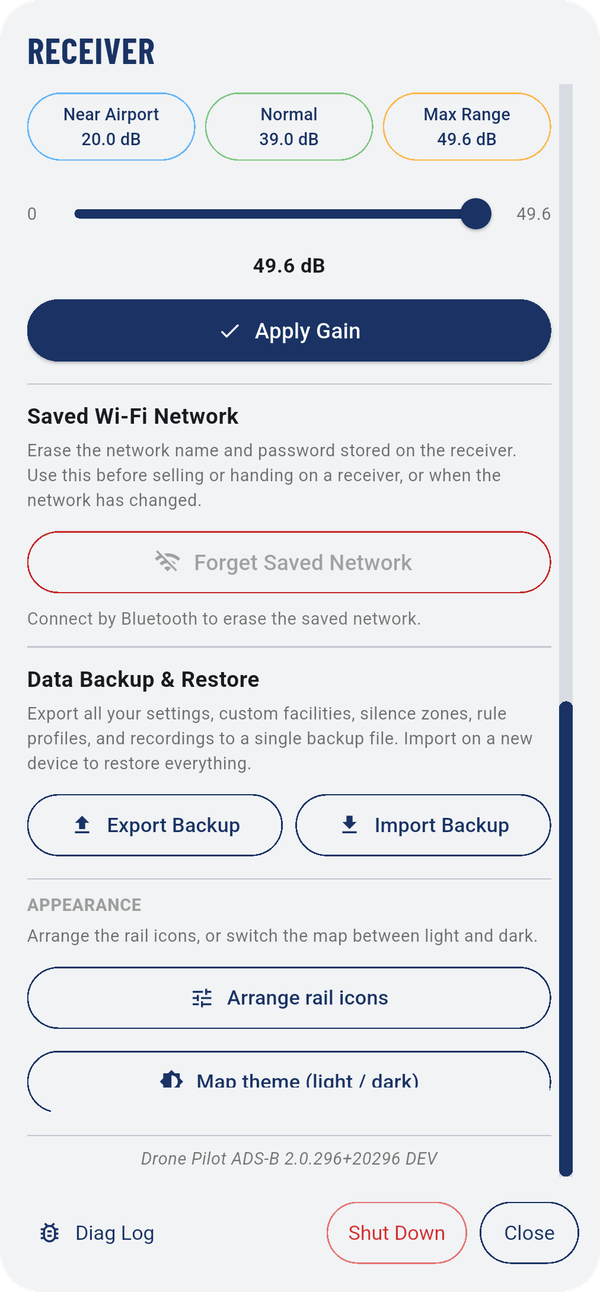
- Bluetooth: Not connected, with Connect.
- Auto-use device GNSS when the receiver has no fix: use the phone's GPS when the receiver hasn't got a position.
- Ownship Identification: your aircraft's ICAO code, so your own transponder doesn't set off alerts.
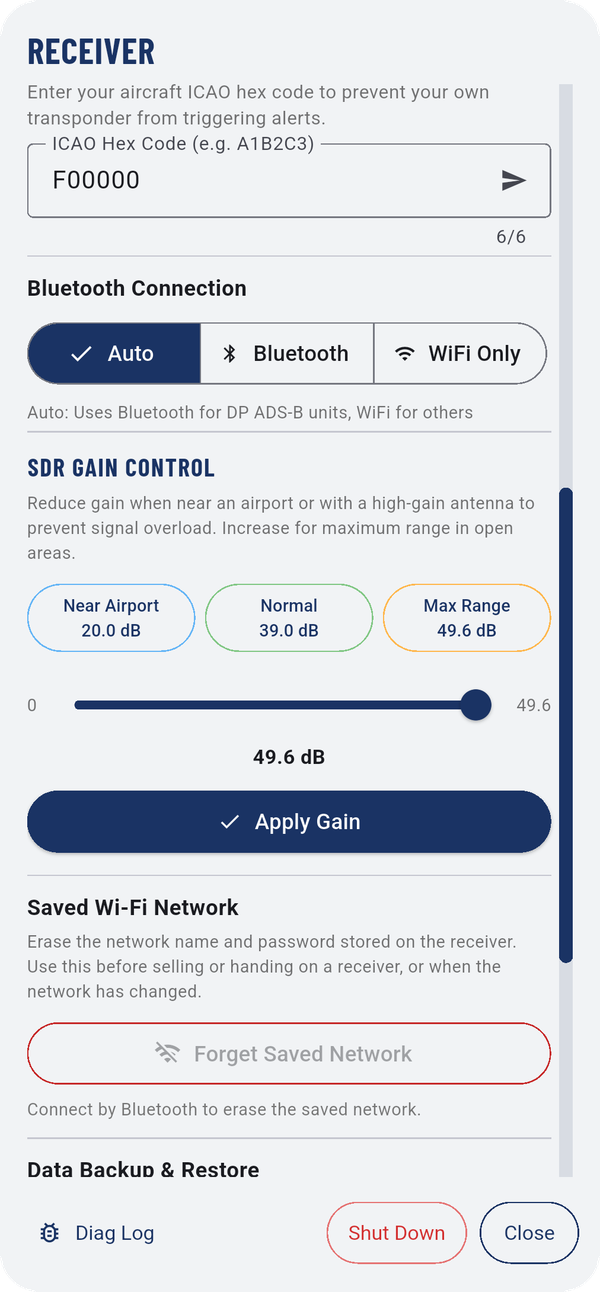
- Bluetooth Connection: Auto, Bluetooth or WiFi Only.
- SDR GAIN CONTROL: presets Near Airport, Normal and Max Range, a slider, and Apply Gain.
- Forget Saved Network: erases the WiFi network stored on the receiver. Use it before you sell or hand on a receiver. It needs a Bluetooth connection.
- Data Backup & Restore (Back up and restore your settings).
- APPEARANCE (Arrange the rail buttons, Light or dark map).
- Shut Down: turns the receiver off safely.
4.13Back up and restore your settings
Export Backup saves all your settings, custom facilities, silence zones, rule profiles and, if you like, your recordings into one file. Keep it somewhere safe, or move it to a new phone and use Import Backup there.